
Installation · Chapter 3
Preparing the SD card
The operating system is loaded onto the microSD card. It is done once, from your computer, with the free Raspberry Pi Imager tool, downloaded from the internet.
A microSD card of 32 GB or more, a card reader, and the Raspberry Pi Imager application (free download from raspberrypi.com/software).
Insert the card and open Raspberry Pi Imager
Connect the microSD card to your computer. It will appear as a new drive. Open the Raspberry Pi Imager application.

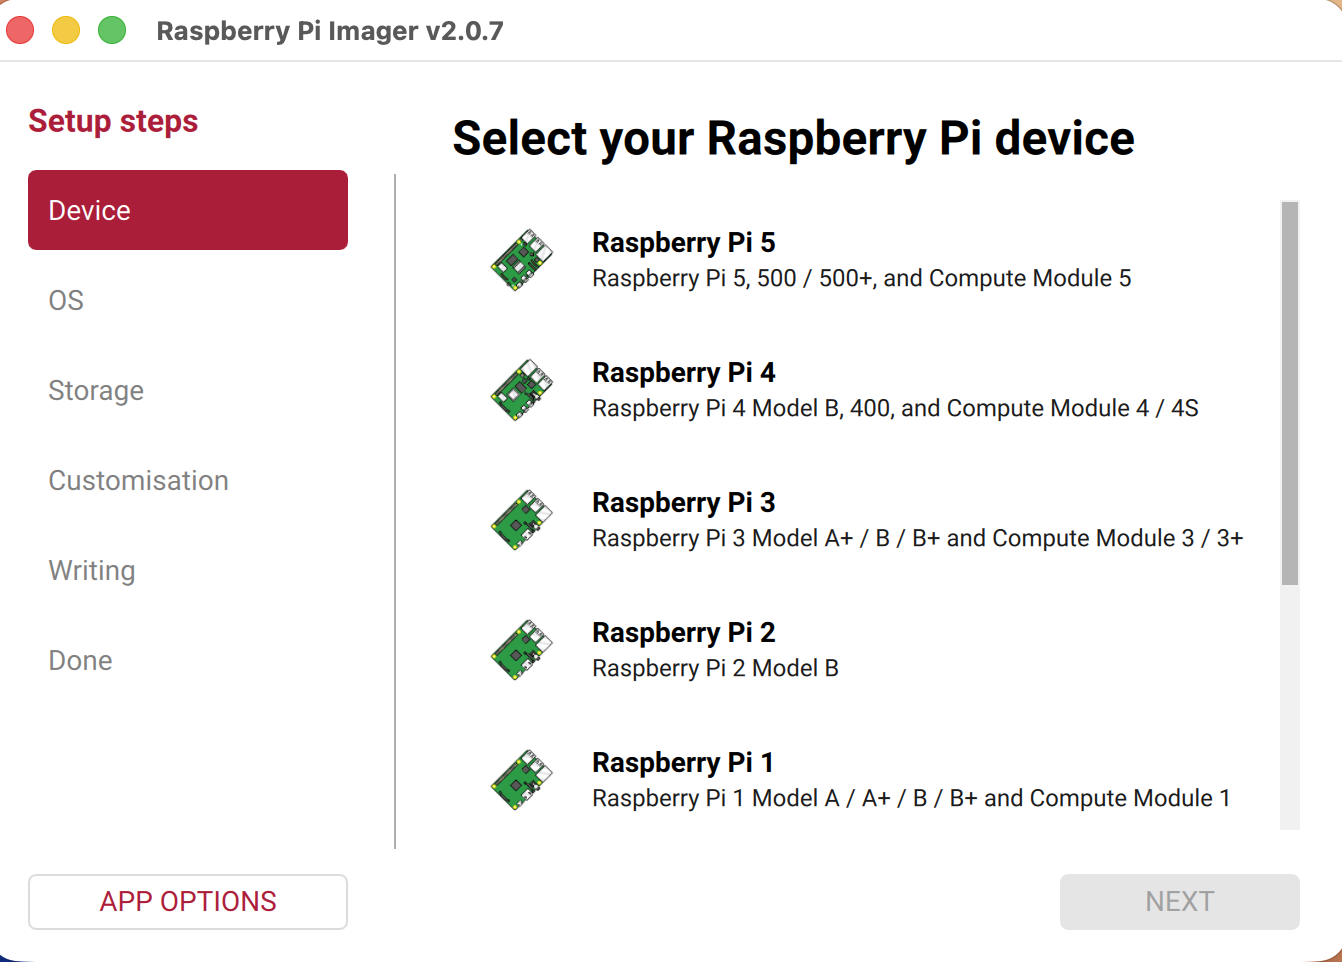
Choose the device
Click CHOOSE DEVICE and select your model: Raspberry Pi 5 or Raspberry Pi 4, depending on your hardware.
Choose the operating system
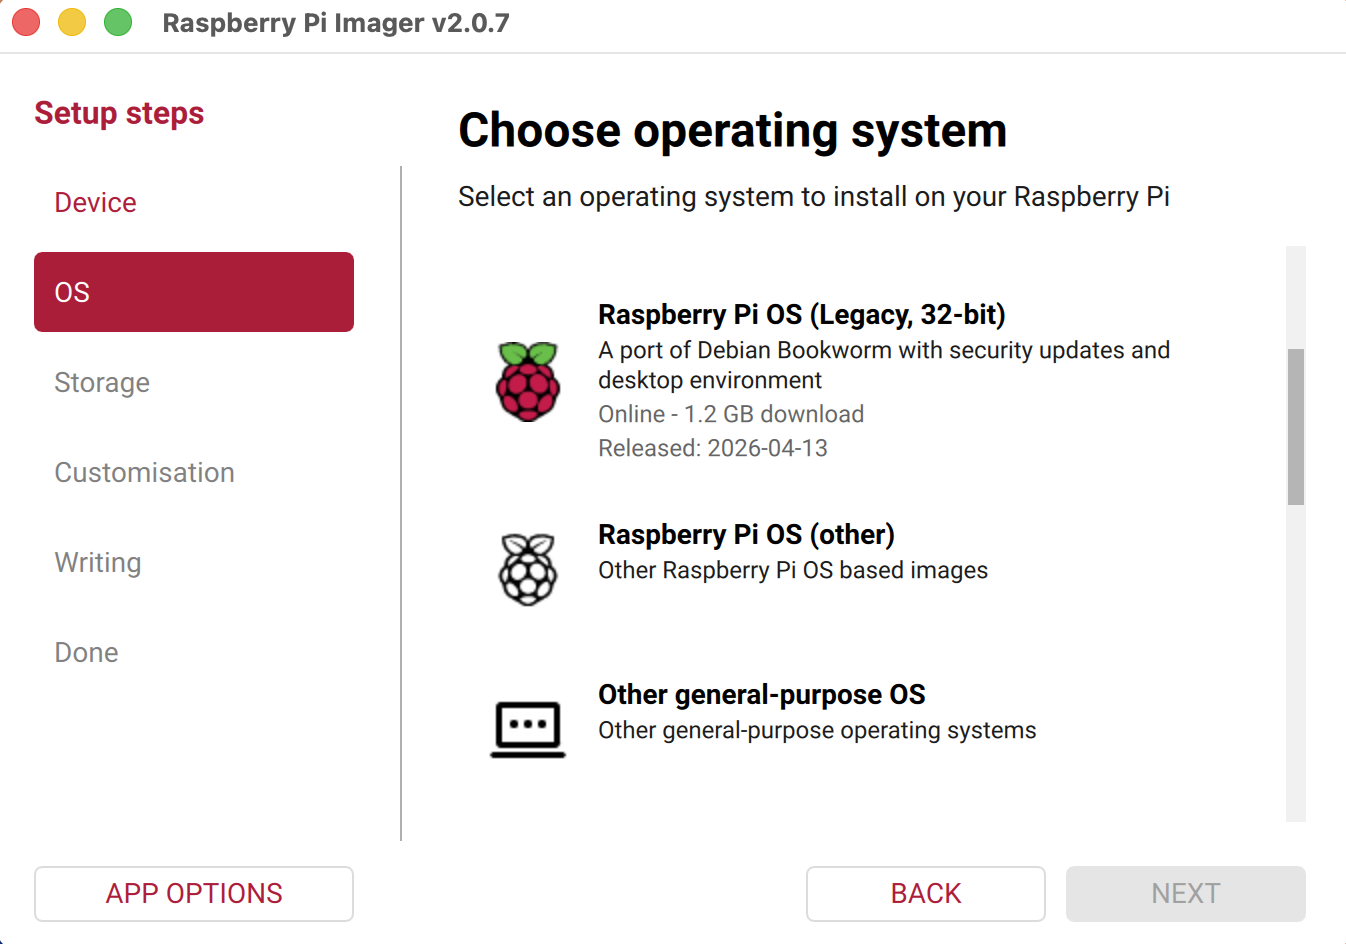
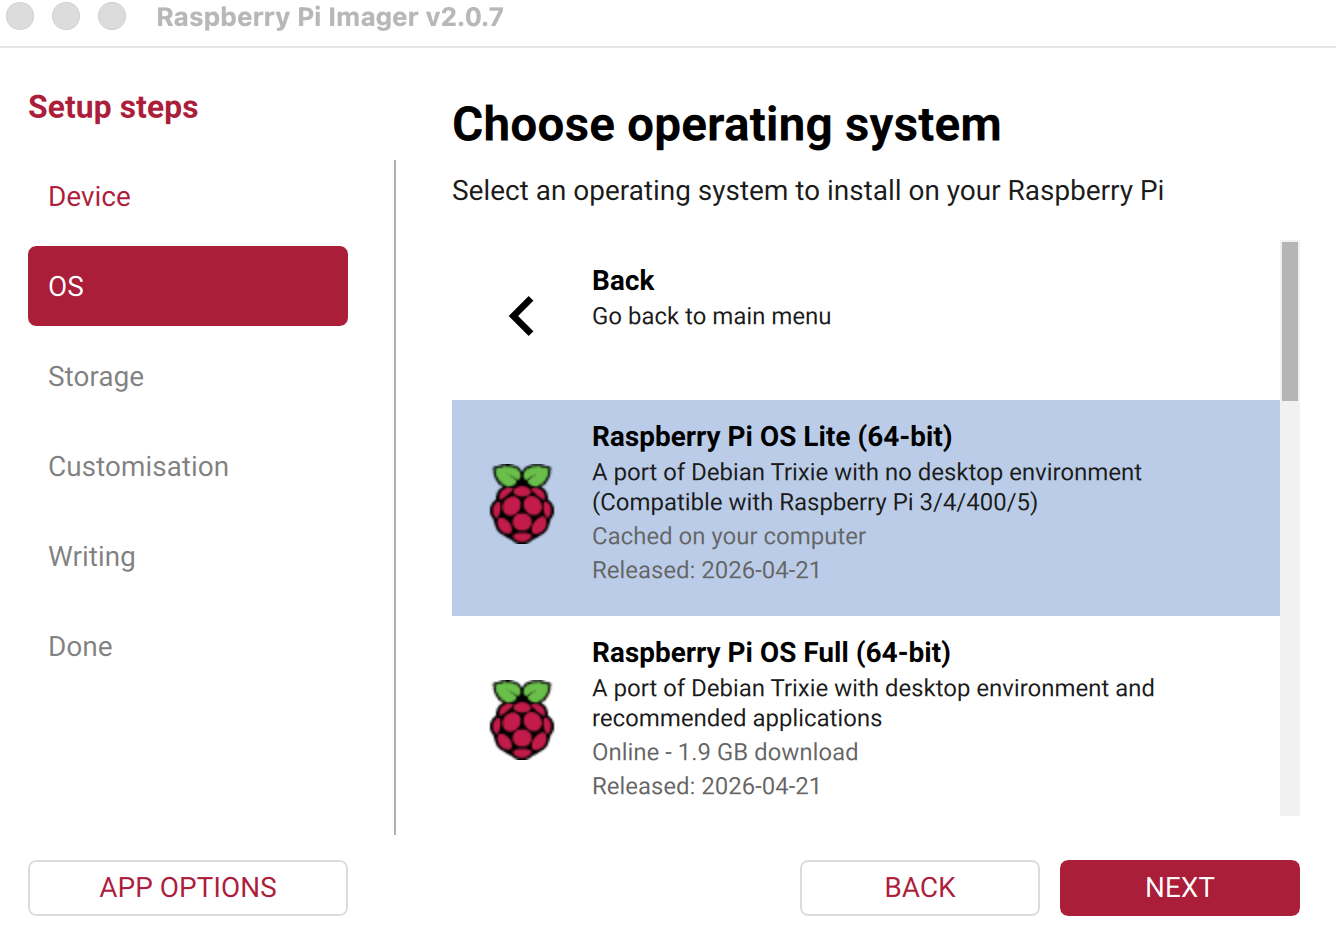
Click CHOOSE OS. Open «Raspberry Pi OS (other)» and select «Raspberry Pi OS Lite (64-bit)».
It must be the Lite 64-bit version. It has no desktop — the Gateway does not need one, and it boots lighter and more stable.
Choose the storage
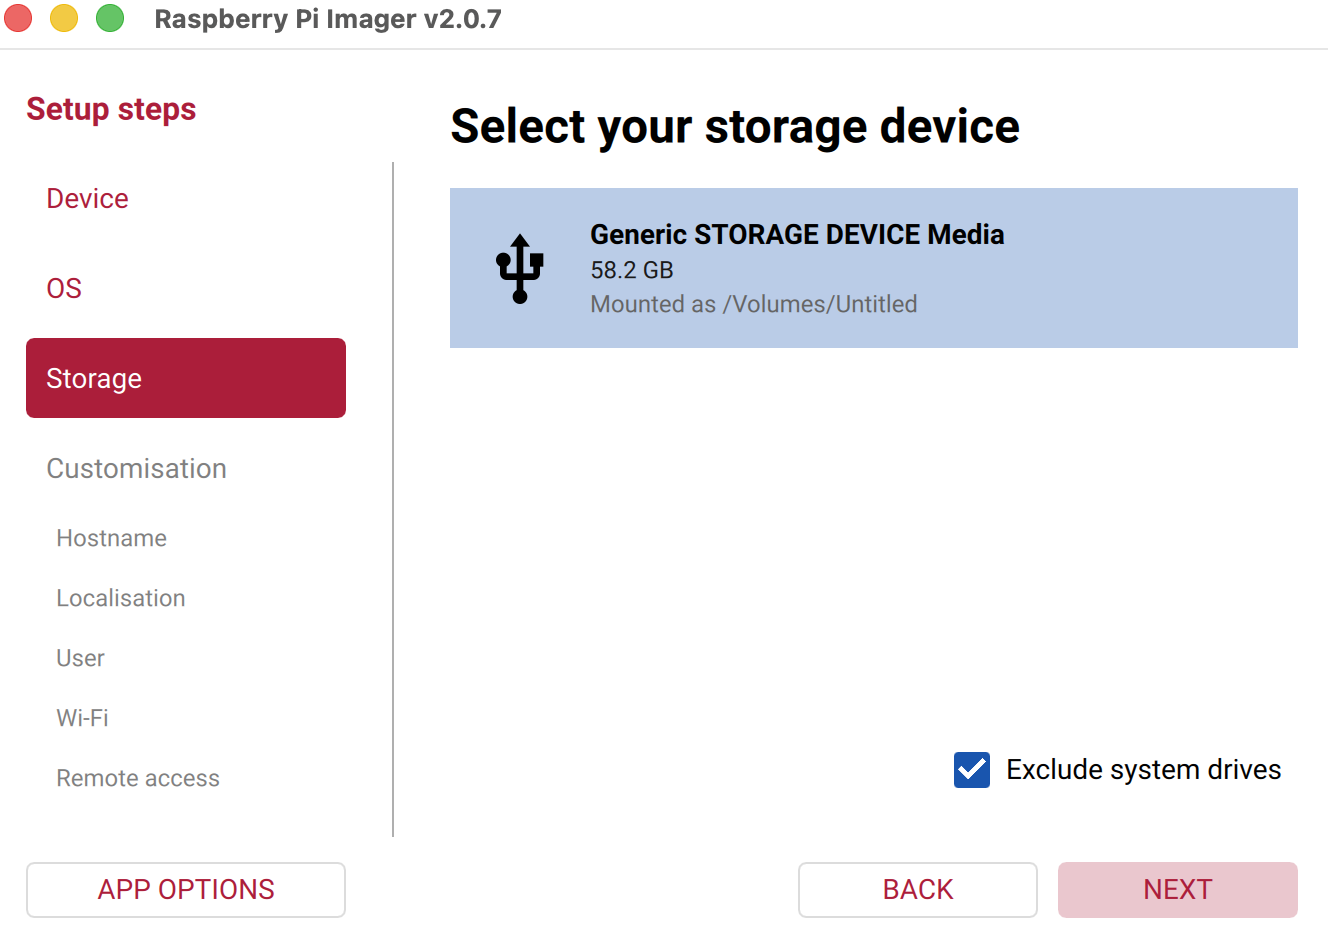
Click CHOOSE STORAGE and select the microSD card.
Make sure you pick the right card. Writing erases all of its contents.
Customise the device
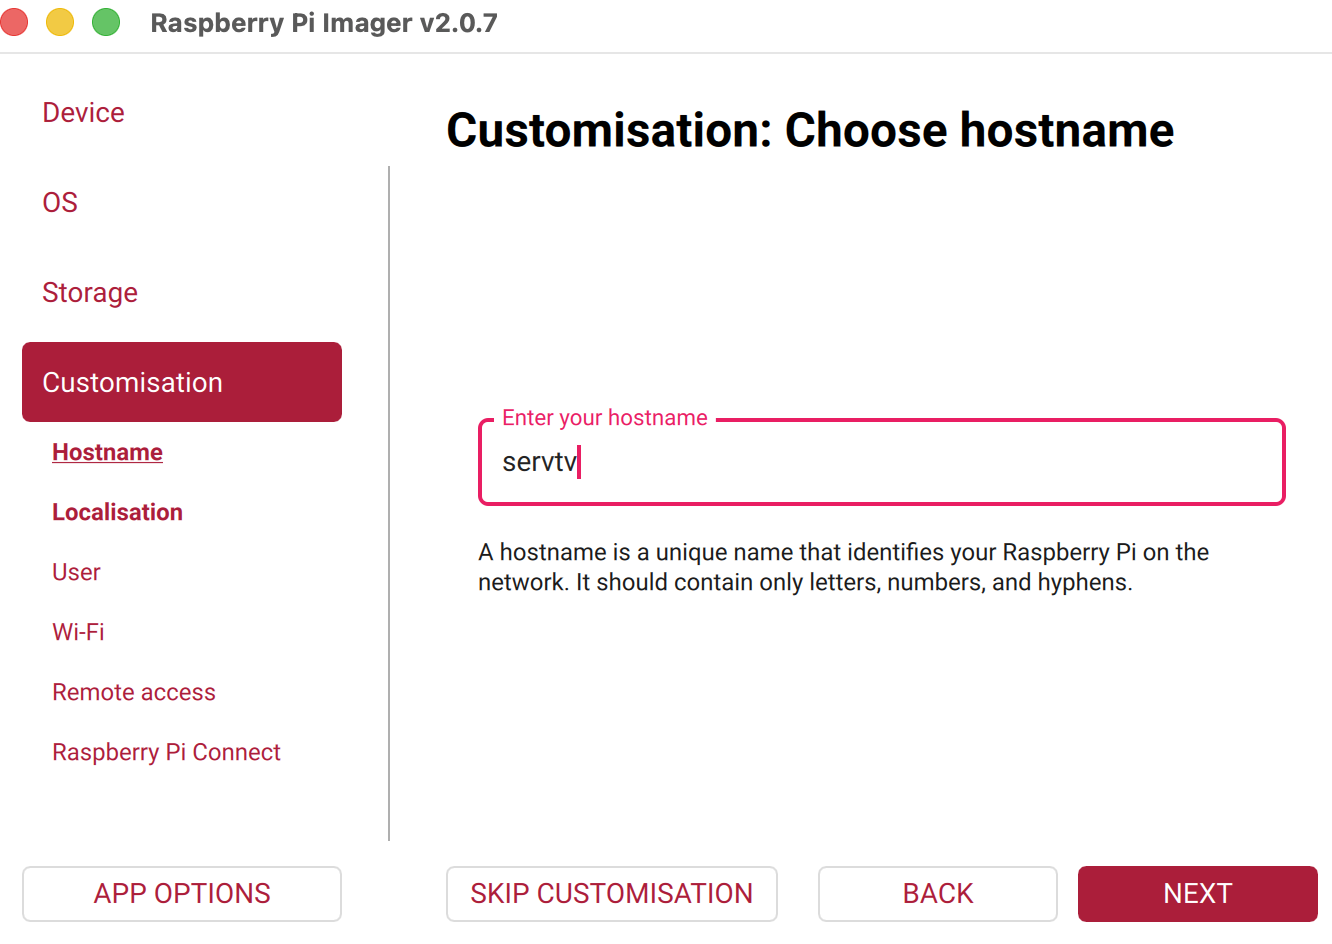
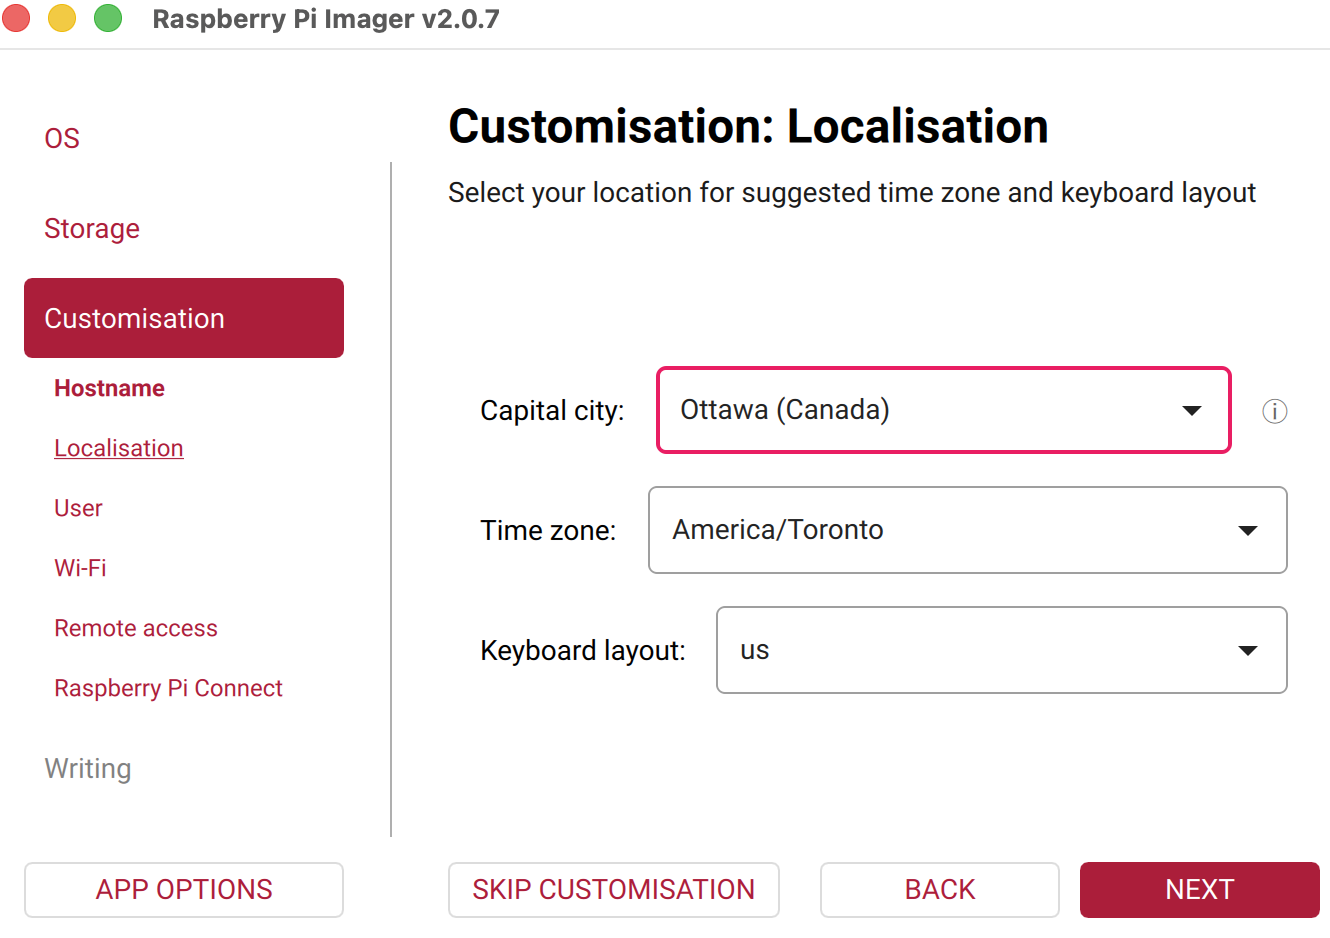
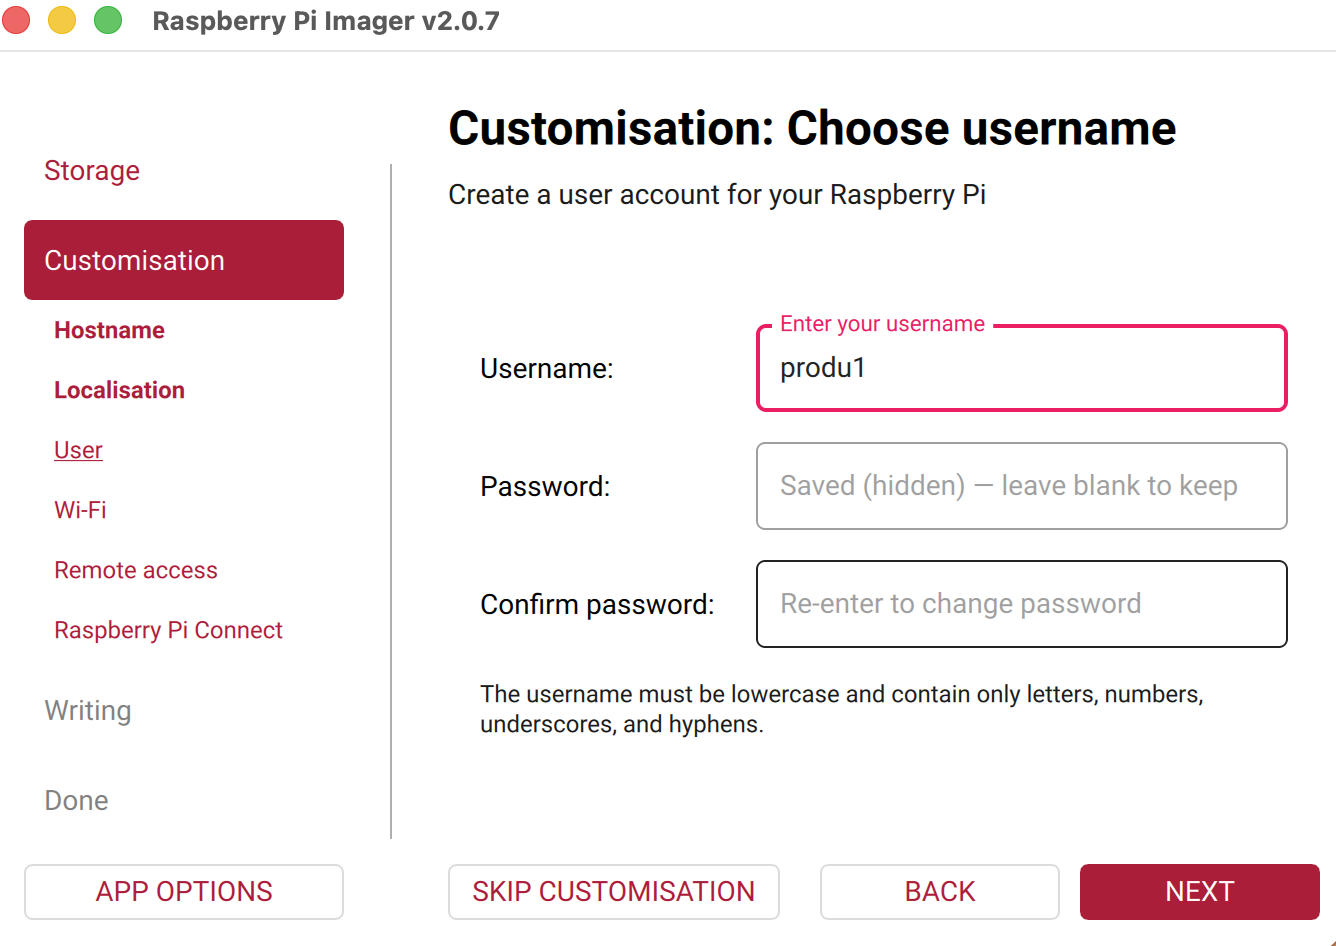
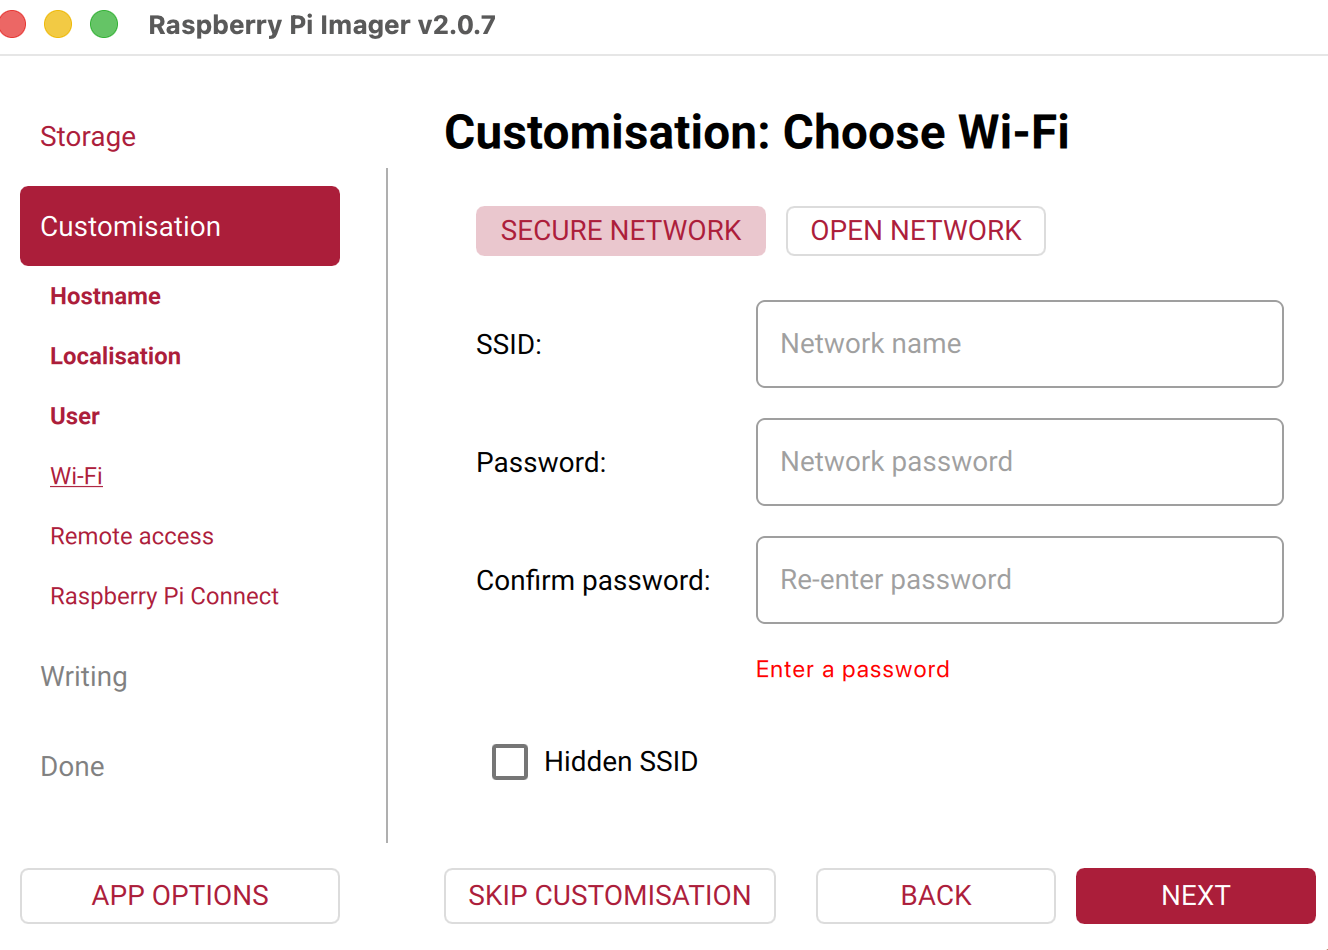
Imager will ask whether to apply customisation. Accept and complete the six screens:
Device name
A unique, recognisable name, e.g. servtv.
Localisation
Select your time zone.
Username and password
Create a username and password. Write them down — you will need them to install.
Wi-Fi
Leave it empty. The Gateway works over a network cable only.
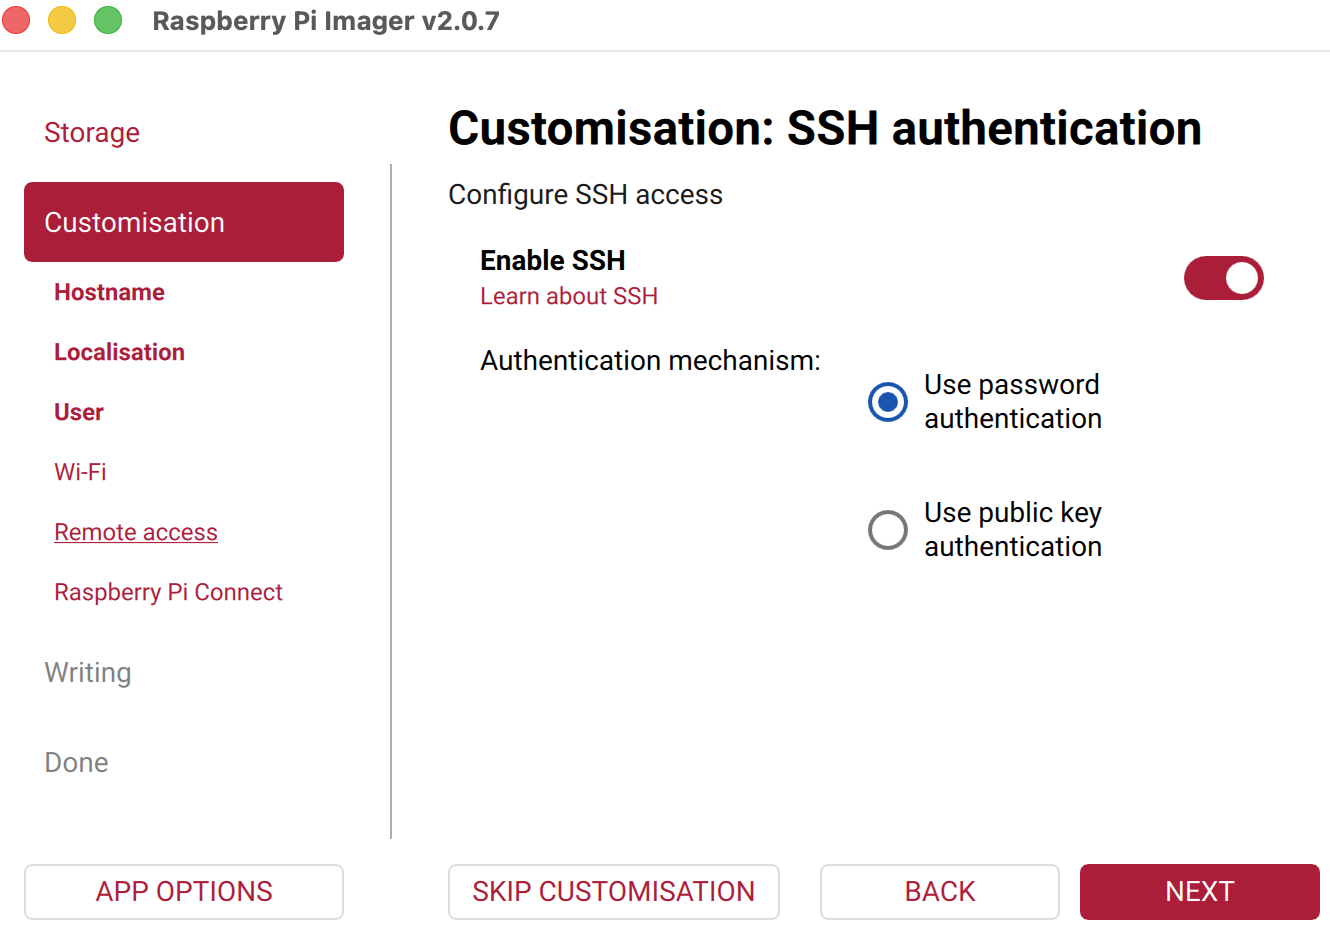
SSH
Turn it on (Enable SSH) with password authentication. Required to install.
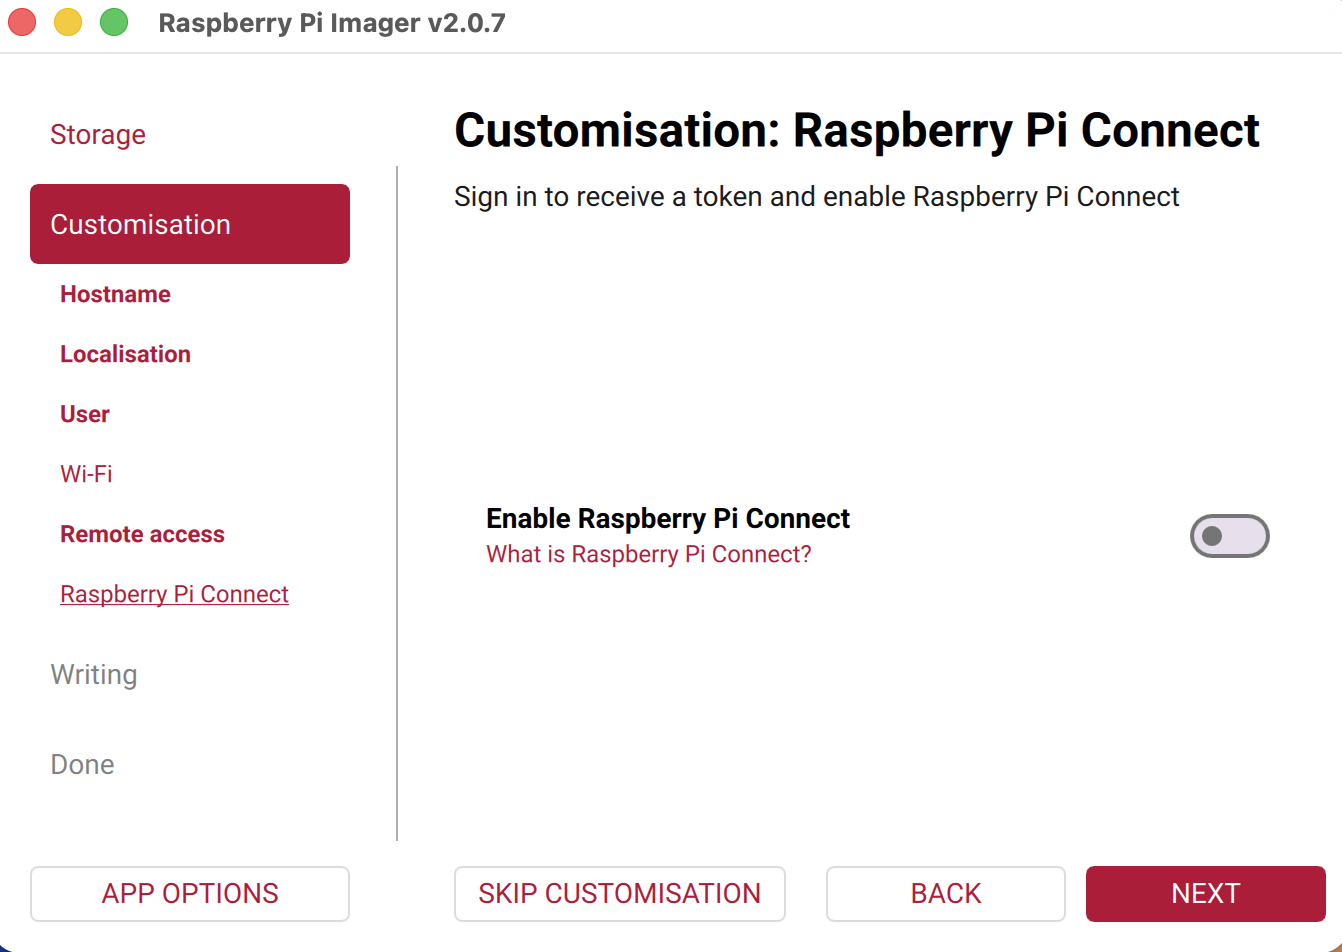
Raspberry Pi Connect
Leave it off.
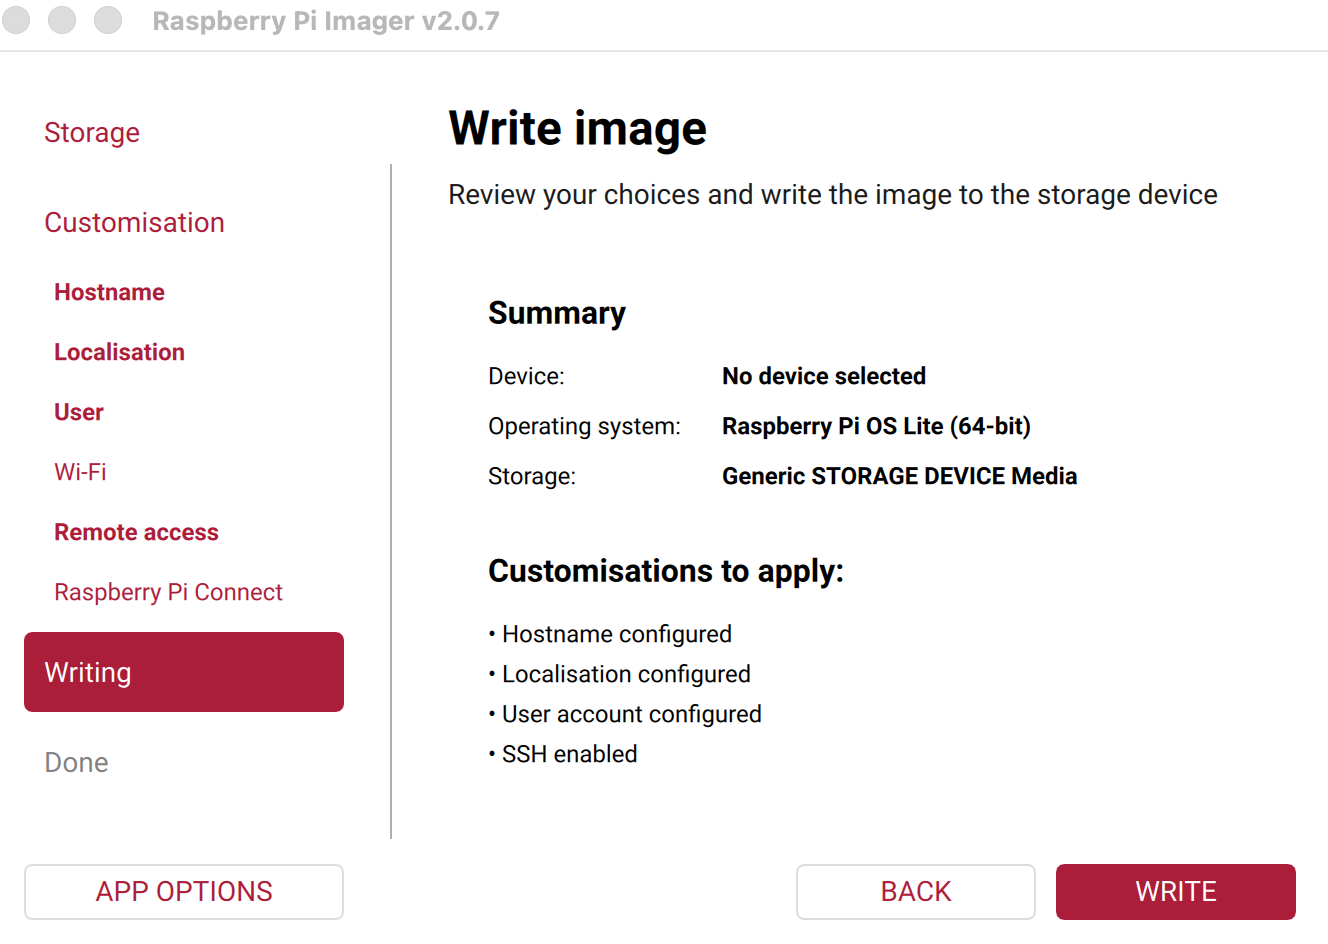
Write the image
Review the configuration summary and click WRITE. Confirm if the program asks.
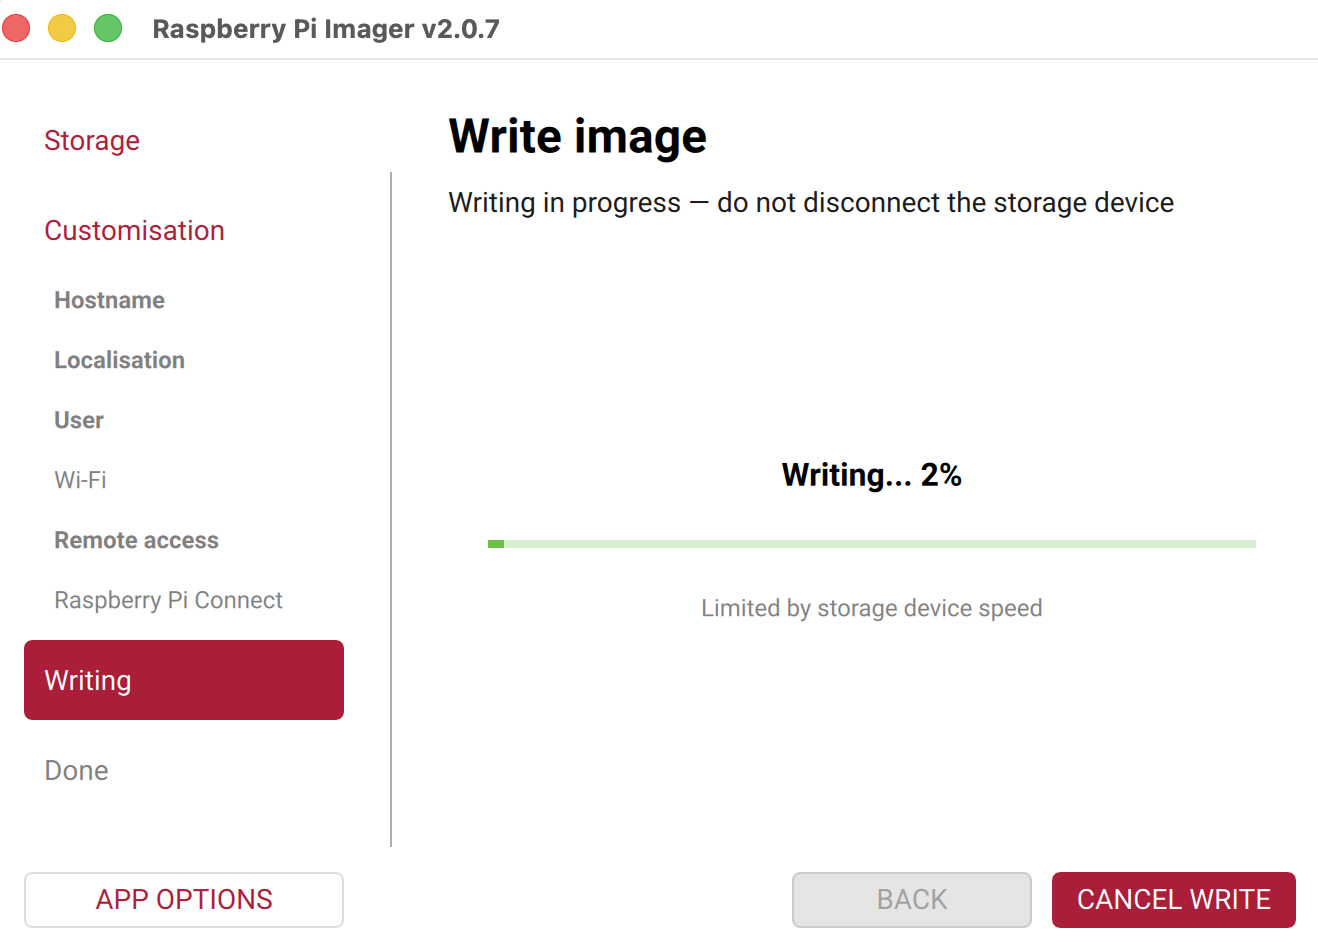
Wait and finish
Writing takes a few minutes. Do not remove the card until it finishes. When done, eject the card safely.
The card is ready. The next step is to insert it into the Raspberry Pi and do the first boot.